I have finally managed to complete my classroom for the 2015-2016 school year. This is my first year teaching first grade (I taught 2nd last year). I didn’t change any major things in my room this year; just added updates where it was needed. I hope you find a few helpful ideas!
As soon as you walk-in you see my classroom library to the right. Last year I had four, medium height book shelves that were a wooden color. I hated these because they were falling apart, didn’t match my color scheme, and the shelves were at different heights so I had to place my bins in random order to get them to fit on the shelves. So, I spent one summer day building these two bookshelves. The shelves are 13” tall (26”-29” total), which ensures that basically any sized book will fit. I love that it’s long and fits directly under my bulletin boards. I got the pink, green, and black book bins from Really Good Stuff. I think they are totally worth the investment. My Guided Reading library labels came from Maria at Kinder Craze.
The shelves with black bins are my students’ individual book bins. They will use these for Daily 5 rotations. I made the “My Book Bin” labels myself and don’t currently have them for sale. I have two Adirondack chairs with pillows in my library as well. I still can’t decided if I want to keep these or not, they are much bigger than I thought they would be. I do love that two students can fit in them and read together though. The smaller chairs were just too small for most end-of-the-year firsties.
The shelves with black bins are my students’ individual book bins. They will use these for Daily 5 rotations. I made the “My Book Bin” labels myself and don’t currently have them for sale. I have two Adirondack chairs with pillows in my library as well. I still can’t decided if I want to keep these or not, they are much bigger than I thought they would be. I do love that two students can fit in them and read together though. The smaller chairs were just too small for most end-of-the-year firsties.
Directly to the left of my classroom library you will find our technology stations. I have two desktop computers, two Chromebooks, one Macbook, and two iPad's to use in my classroom at all times. I received the Chromebooks from DonorsChoose last year! I use plastic crates as storage and seating for my technology station.
Above my library and technology station I have three bulletin boards. I use one for our CAFÉ board. This will be my first time using CAFÉ in my own classroom. You can find the menu headers in my TPT store for free, just click here. I hope to keep up with all our reading skills on here, and encourage my students to use it while they read.
The second bulletin board is my Word Wall. I am not using our schools reading basal this year so I’m going to integrate vocabulary through theme. I will also place our first grade "red words" on here. We should study 5-6 “must know” words every week. These are the words that will be added to our word wall.
The second bulletin board is my Word Wall. I am not using our schools reading basal this year so I’m going to integrate vocabulary through theme. I will also place our first grade "red words" on here. We should study 5-6 “must know” words every week. These are the words that will be added to our word wall.
My third bulletin board is our Super Improvers board. This idea was probably one of the greatest I found and implemented last year. When I interviewed for my teaching position one teacher asked me if I had ever heard of Whole Brain Teaching. I went to school away from this area and had never heard of it before. I immediately went home, watched a million YouTube videos, and bought the book. I started researching it first because I felt awful that I didn’t know what it was, but then I actually started buying into all the brain research and management tools they were suggesting. Anyway, Super Improvers is one way I like to motivate and manage students in my classroom.
I cover all of my bulletin board in sheets from Wal-Mart or Target. Our school doesn’t provide bulletin board paper on a regular basis, and I am constantly changing things out. Sheets are the easiest method for teachers like me, that can’t make up their minds! All my haphazard burlap came from Hobby Lobby. The black and white chalkboard letters came from The Parent Teacher Store. I made the tissue paper balls last summer and they have surprisingly not moved since then (although I’m sure they are very dusty).
The back wall in my classroom mostly holds student lockers, which I have a love/hate relationship with : ) They are perfect for storage, but they also are VERY loud. The nametags and locker numbers came from Elementary Shenanigans on TPT. Side note- I bought this classroom décor back from Hope King last summer, and it was a lifesaver. I found everything I was looking for before I knew how to make it on my own! The colors are perfect for any classroom!
Above my lockers I have a number line and our Daily 5 I-charts. I pulled these down when we were learning the expectations for each but I wanted to make sure and have a space to put all of them for the entire year.
To the left of my lockers I have a tall metal cabinet I use for storing school supplies, math manipulatives, paper, math centers, etc. We don’t need to look inside at that mess! On the outside of my metal cabinets I have my Classroom Jobs. I used the editable labels from Hope King’s décor packet…again, and made my own job chart. I take pictures of my students on the first day and use those to assign jobs on the job chart. My students love being able to see their picture in our classroom!
The third wall in my classroom has a large window, tall wooden cabinet, and short wooden cabinets with a counter top. I use the shorter cabinets to store glue, pencils, crayons, pens, craft materials, etc. The back cabinets are the hardest to get to so I store seasonal things in there. I keep all my school supplies in plastic shoebox crates I found at Wal-Mart. I try to keep my counter tops fairly cleaned off because I know through the year that’s where I will throw all my projects and copies. However, I do have our classroom treasure box (which I never use), and a small storage drawer container.
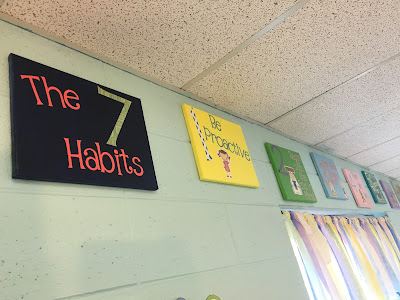
On top of my lovely air conditioning unit I keep wooden crates filled with all my teacher binders, sand trays, and paper stacks-basically everything I don’t want my students to touch. I keep my window ledge pretty bare, except my favorite almamater canvas, and a lighthouse portrait my favorite 12 year old made. Our school is a Lighthouse Leader in Me School. I have the seven habits posted above my window on canvas’s I made last summer before moving in.
In the far left corner I have a sink, a tall wooden cabinet, and of course, my coffee maker. I keep a few teaching materials and my office supplies in the back wooden cabinet. It’s a little hard to get to so I can’t keep much in there! Also in that corner are my filing cabinets. I stuff as much into those cabinets as I possibly can because I know they aren’t going anywhere!
In front of my counters are student cubbies and our writing center. Each of my students has their own cubby for materials they need to take home or store. I made the “My Cubby” labels but don’t currently have them for sale. On the other side of the cubbies is our writing center. This is the first time I have made an actual separate writing center for my students. I knew this would be important when implementing Daily 5 this year so I figured I would give it a shot.
The main wall in my room seems to be very busy this year. I have an Activboard which is connected to my classroom desktop computer. I use an office table as my teacher desk because I didn’t like the bulkiness of regular teacher desks, but I also didn’t want to get rid of mine altogether. During the day, I mainly use my laptop and small group table to work at (when I actually get a chance to do desk work), so I don’t have to turn my back to my students.
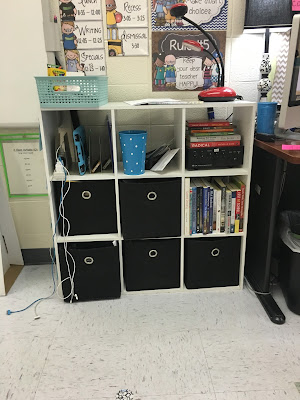
I keep a white storage shelf to the left of my desk. This is where I store most of my go-to materials (guided reading tools, guided math tools, anchor Scento markers, etc.) I got this at Meijer around Christmas last year. I wish the shelves were a little taller so I could place binders in them, but it’s perfect for placing all your random materials that just need to be thrown into a basket. The top left corner is also where our Listen to Reading devices are held.
Under our Active board is our whole group area. Last year I simply had students sit on the floor when I needed them to, but moving to first grade this year I knew we would use this space a lot more. I bought foam puzzle pieces from here to serve as our classroom carpet. However, my friends were very distracted by this during whole group time (breaking and tearing the pieces off). I decided to move the "carpet" to our classroom library area. I bought vinyl contact paper, cut out small circles, and stuck them on the tiled floor. I wrote names on each circle and had instant sit spots for each kiddo! I used the contact paper last year on the tiled floor. It works perfectly! Yes, I have some friends that pick and pull at theirs, but a roll of contact paper is so cheap it is very easy to replace throughout the year. I also use a different colored contact paper as our "stand spots."
Around our board I have a place to hang anchor charts, a hundreds chart, and helpful writing posters. I can already tell I’m going to love having the hundreds chart for math centers and modeling this year! At the top of this wall I have the alphabet and number posters I made; which you can find here.
Also on my wall, above my desk are my hand signal posters. Having these posted was a lifesaver last year. It saves you and the students a lot of “Can I ___?” moments. These voice level posters are also included in the pack.
My desk area is very limited but I only keep what I have to. Clutter free is the way to be! My toolbox labels were purchased from Ladybug Teacher Files. I keep learning objectives posted on the bulletin board above our desk. This was a last minute idea I borrowed from The Brown Bag Teacher. I am trying SO hard to keep it updated!


No comments
Post a Comment